
-By: Michael (Vyroid)
Welcome back everyone! I consider myself pretty lucky that my local meta has around 12 WMH players, most who have been playing a while and have multiple armies that give me a diverse spread of factions to play against. One such player, Thomas, has drifted away from Trollbloods for now to start Convergence of Cyriss, and has been kind enough to let me borrow pieces of his Troll army while I slowly grow my own. Thanks to his generosity, in this installment I bring you a glorious 35pt battle!
I wanted to start with what I had familiarity with so I included everything from my Battle Box and added to it from the models that were available to me. With 3 light beasts already in the mix, I knew the Stone was a no brainer, who doesn’t like the idea of an ARM 21 Bouncer? Now I needed a heavy beast, so say hello to Mr Dire Troll Mauler! After playing with nothing but lights for a while, I was really excited to put this guy into my list. High POW, high ARM, a great animus, and all those boxes…I just knew he was going to get some work done. To round everything out, I felt I needed a true offensive unit to get the feel of a “real game”. For this I chose a minimum sized unit of Fennblades. I like that they have reach on their weapons and hit decently hard. And with Vengeance, I imagined them working well as a jamming unit, plus it could extend their threat range if my opponent decides to shoot at them. I also decided to add their Command Attachment as gaining 2” and pathfinder from the mini-feat seems too good to pass up, and there’s the added bonus of Cleave to get a little more work done when they hit the front lines after a charge. Looking over what I’ve put together, I felt like I had a very workable 35pt game and was ready to play!

- Trollblood List:
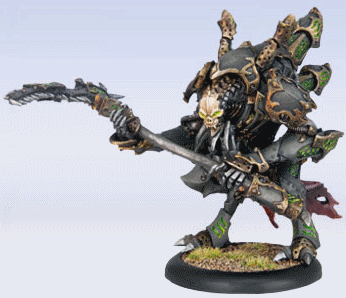
Ragnor- Dire Troll Mauler
- Axer
- Impaler
- Bouncer
- Min Kriel Stone Bearers
- Min Fennblades + CA
Our local Cryx player was at the LFGS and free to play, and put together the following list:
- Cryx List:
Lord Exhumator Scaverous- The Withershadow Combine
- Inflictor
- Stalker
- Night Wrench
- Cephalyx Overlords
- Max Bane Warriors
We rolled for scenario and came up with Outlast, so two large zones to contest. I’m really excited to play with a scenario after the horrible BB game I had in my last article where the Retribution player kept dancing around shooting my beasts with minor retaliation. If my opponent tries similar tactics, at least this time I’ll be scoring some scenario points!
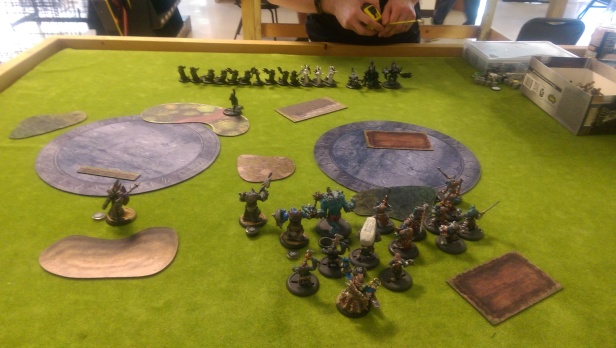
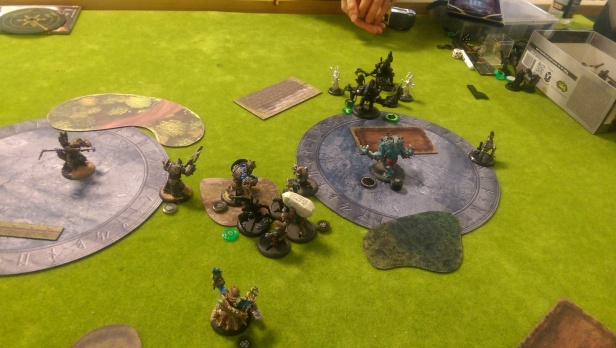
I won the roll and chose to go first, as it seems beneficial to fueling the Stone. Unfortunately I forgot to take a picture of deployment, but the general idea was I set up the Fennblades on the right, expecting to use a forest for cover round 1 and then use the mini-feat to charge into battle and hold the right zone on round 2. I deployed the Mauler, Bouncer, and Axer in the middle with Ragnor and the Stone backing them up, and I deployed the Impaler on the left side of the line. My thought here was to have my damage dealers (Axer/Mauler) in the center for flexibility, allowing them to move to whichever zone was the focus of my opponent, and the Impaler on the left to put pressure on that zone. Plus, if my opponent were to focus towards the right or center, the Impaler could be in a flanking position and able to take some shots at key pieces. My opponent set up with his Bane Warriors and Stalker on my left, the Stalker was pretty close to the zone since it gets to advanced deploy, the Overloards and Withershadow Combine in the middle, and his caster and the rest of his jacks on my right.
Round 1
I activate the Axer to cast Rush on the Impaler and run up 10”. I then activate the Impaler who runs up 12”. The Fennblades run up 12”, keeping most of them behind the forest, with one lone warrior just into the right zone. I then run the Mauler and the Bouncer up 10”, keeping to the center of the board. I activate Ragnor and cast Pulverizer on the Mauler, dump 3 into the Stone, and walk up 5”. Lastly I activate the Stone, moving them up 5” and in front of Ragnor, spend 1 fury to activate Protective Aura, and that’s my turn. At this point I’m feeling pretty good about how I set up, but I do wonder if it was a bad idea to put the Stone unit in front of Ragnor due to line of sight.
My opponent moves his Bane Warriors up towards the left zone and hides his Stalker in the forest. The Overlords and Combine move up the center to hide behind an obstruction, the Nightwrench moves up into the right zone, and the Inflictor and Scaverous move cautiously toward the right zone. Using the Nightwrench as an arc node, Scaverous casts Feast of Worms at my Fennblades, disabling one who makes his Tough roll, so he gets knocked down, and also killing one of the Stone Bearers. He also casts the Death Ward upkeep, buffing the Inflictor’s ARM. I’m still learning to take pictures during the match, and unfortunately I forgot more often than I remembered after my opponents turn. Bear with me, I’ll do better in the future.
Round 2
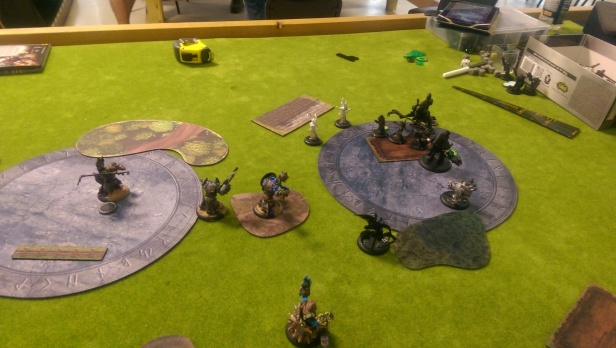
I leech fury from my beasts bringing Ragnor back to full, I upkeep Pulverizer on the Mauler for 1 fury, and since a Fennblade took damage last turn, I get to trigger Vengeance! With no enemy models close enough, I’m not able to take advantage of the attack after moving all but the KD model 3”. But that move was all I needed to get most of the Fennblades into combat as I use the CA’s mini-feat, giving me a charge range of 11”, plus their two inch reach with weapons. I manage to take out 2 Bane warriors on the charge, and another from Cleave, plus deal enough damage to the Nightwrench to take out a system (not the cortex unfortunately). Not a bad day’s work, and now my enemy’s models are tied up pretty good. The Impaler moves into the left zone behind a wall, casts Far Strike to extend his range and makes a boosted attack at a Bane Warrior. I get a crit smite and slam the Warrior into the Stalker, but since the base is smaller, it doesn’t knock down the Stalker or deal collateral damage. The upside is that slamming into the Stalker meant the damage roll against the Bane Warrior was boosted, saving me a fury, and ensuring the Warrior died thanks to a decent roll. The Axer casts Rush on the Mauler, then moves himself towards the left zone, ready for battle. The Mauler runs 12” into the right zone, but is still too far out to start fighting. I move the Bouncer into some ruins between the two zone and prepare for impact. To round out my turn, I move the Stone up and to the left, making sure I have the Bouncer and as many Fennblades in the aura as I can, and spend a fury to activate followed by moving Ragnor up to cast Earth’s Sanctuary on the Bouncer, himself, and some of the Stone bearers before putting his remaining fury into the Stone and feating. Again, I’m feeling pretty good with my execution at this point. Ragnor is camping zero but felt pretty safe where he is. I’ve got presence in each zone, and the Fennblades are tying up charge lanes well enough that I feel some of those hard hitting Bane Warriors won’t be getting to my beasts, and if they do, thanks to my feat, they’ll be doing one less die of damage.
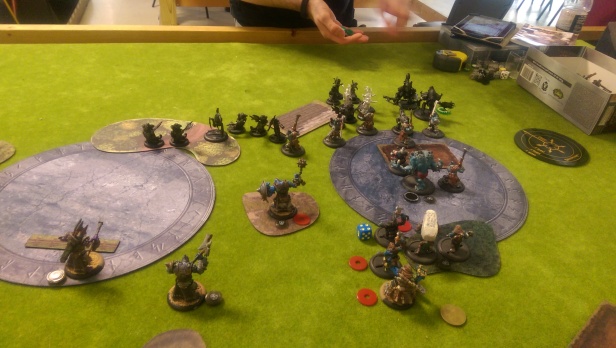
My opponent started out by making short work of my jamming Fennblades thanks to the sprays of the Overlords, though it did take all 3 of them to do it thanks to my feat. The Nightwrench moves up into a position to later be used as an arc node against the Stonebearer, luckily no casualties there. Scaverous casts Feast of Worms on the Mauler to debuff armor, maintaining the upkeep on the Inflictor for free, and then teleports himself a short distance for better positioning. The Combine clears up the remaining Fennblades ensuring I won’t be getting any Vengeance next round, and then our forces clash hard! The Bane Warriors charge in, with 3 going on my Bouncer with the Stalker, 2 going for the Mauler, accompanied by the Inflictor, and the last one heading into the left zone to stop me from scoring. Thanks to the Stone and my feat, both beasts manage to survive the onslaught! My opponent is surprised, as am I, but apparently that’s what Trolls do, survive!
Round 3
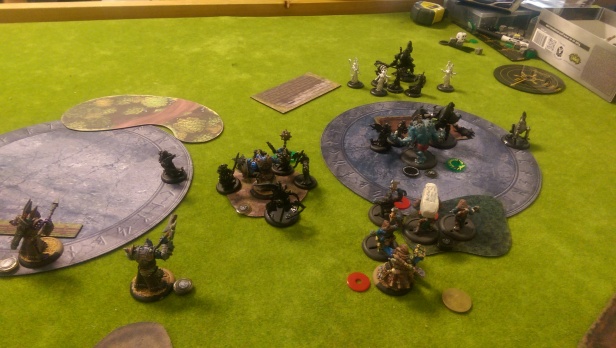
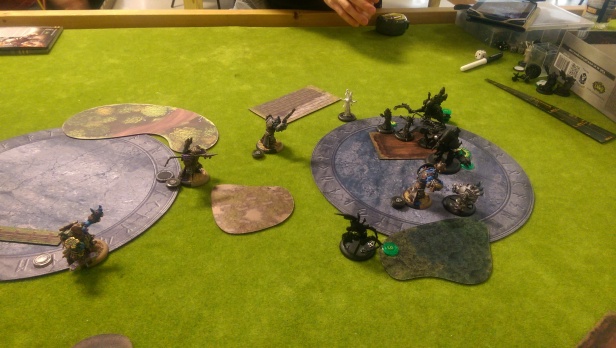
Time to do some work! I start by attacking the Inflictor with my Mauler powered by Pulverizer, saving the fury for more attacks otherwise I would have stacked Rage for massive damage. I boost both initial attacks to ensure they hit, then use Smash & Grab to throw him at Scaverous who’s out of range, resulting in collateral damage to one of the Overloads who becomes a greasy stain on the battlefield. I got lucky here as the Mauler had Puppet Master cast on it the previous turn by the Combine and when he had me reroll damage I rolled higher! I use the remainder of my focus to buy attacks against the Bane Warriors wiping them out, and saving myself from their ARM debuff. Next up I charge in with my Axer and using his Thresher special attack, take out 3 Bane Warriors, including the one in the zone. Uncharacteristically, I charge in with the Stonebearers to try and eliminate the last Bane Warrior and the Stalker, but they don’t do much. I am forced to use my Bouncer on the last Bane Warrior, as the ARM debuff cannot be allowed for another round. The Impaler just hangs back with no targets to attack and to conserve fury, which I’m already over and might have to deal with a frenzy. Ragnor fills up the Stone, moves towards the left zone to dominate next round, and camps 1 fury. With the left zone free of enemies, I’m able to score 1 point on scenario.
This turn my opponent takes out the Stone with a combination of the Stalker, Overlords, and the Nightwrench as an arc node, casting Excarnate. Luckily, I’d eliminated his Bane Warrior unit the turn before, so he was not able to return a grunt to the table. He also wipes my Mauler off the table with the Inflictor, The Combine, and Excarnate from Scaverous. Thanks to this, I’m able to reave part of the Mauler’s fury to Ragnor, and leave him with enough space to leech the rest from the living beasts, saving me from any frenzy rolls. Having taken out the last of my contesting pieces, and moving his caster into the zone, my opponent gets 2 points for dominating the right zone, and I get another for controlling the left, putting us both at 2 points.
Round 4
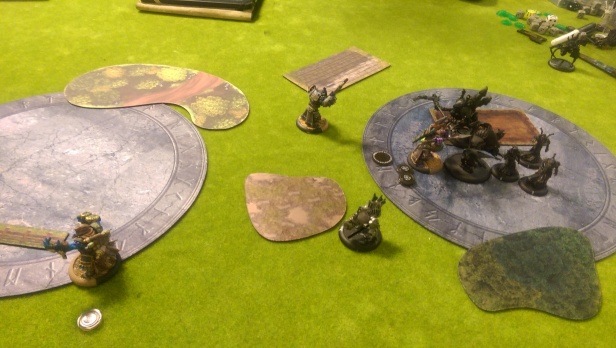
At this point I did a little math and realized I needed to contest the right zone or I could lose on scenario. I charge my Bouncer into the Nightwrench and sadly, after all of his attacks, the jack was still standing, though severely wounded. My Axer charges and eliminates one the the Overloards, but is left with nothing to do after that as no one was close enough to play. Ragnor moves into the zone to dominate, and casts Pulverizer on the Impaler. I activate the Impaler and take a shot at the weakened Inflictor, and roll horribly for damage. Ragnor is camping 1 fury, and since I’m contesting the right zone, I’m the only one to score this turn bringing the scenario to 4-2.
My opponent starts by taking out my Bouncer with a combination of the Inflictor and The Combine, netting me 3 more fury to use for transfers, which was a side effect my opponent later realized he overlooked. With the Axer and Impaler so close to the right zone, he sees that his only real option at this point is assasination and brings the Nightwrench up to take a shot at Ragnor, dealing 6 boxes which I don’t opt to transfer as the Stalker is still a threat. The Stalker walks up then jumps over me to get in my back arc for attacks, and lucky for me, the damage rolls are pretty bad, dealing 1-3 boxes each attack, so I don’t actually end up transferring any damage! The Stalker contests the left zone and Scaverous dominates the right, bringing the scenario to a tie at 4 a piece.
Round 5
As a precaution, I charge with the Impaler to make sure I have something in the right zone incase I can’t clear out the Stalker with Ragnor, dealing some more damage but not quite killing the Inflictor. Ragnor then turns around to put a beat down on the Stalker, successfully killing it and cinching the win on scenario, 6-4!
Wrap Up
Whew, what a fight! Overall I think I was able to execute the majority of my initial plan, which gives me confidence that I’m starting to understand the game and the Trollblood army pretty well. I was surprised that I never used Rage, though I did keep Pulverizer up all match. I just never seemed to have the fury to have Ragnor cast it, and the rest of my beasts were too far from the Mauler to be targets. I also never got to use snacking, since everything was undead. I was really looking forward to healing my Mauler when he took out some models…maybe next time!
In hindsight, I realize that I should have transferred the 6 damage the arc node did to Ragnor, just to be safe, and also during round 4 I should have positioned the Axer in a way that he would have LOS to the zone as the way he was facing I could not charge anything. I did expect the Fennblades to tie up a little better on round 2, but in the end they did require a fair amount of resources to clear out.
As always, I learned a lot during the match, most importantly how strong Ragnor’s feat is when used at the right moment. I learned that I need to plan better for when something is going to die, as I put some fury into the stone just to have it eliminated the next turn. Overall, I’m finding Rangor to be a pretty solid caster who helps his battle group out and can handle himself in combat when he needs to. Some weaknesses would be found in his lack of threat extension, and he doesn’t do a whole lot for units since his buff spells target models and not model/unit. Also, most of his spells are pretty costly, so I’m thinking a Runebearer is a necessity in a larger game.
As far as this list goes, I think I’d stick by my initial thoughts when building it, it’s pretty solid and seemed to handle what the Cryx list threw at it. I’d like to play it against a few more opponents and see what it lacks before growing to a 50pt game. On the impact turn, I realize there is a lot of potential to frenzy, so maybe I’d add in some Whelps, or drop one of the light beasts for another unit or swap out the Impaler for a Swamp troll. His animus could help protect Ragnor, and the Fennblades as well if he’s close enough. I also want to try some movement shenanigans, I really like the idea of pulling something out of position unexpectedly, and to see how well crit consume works out; on paper it sounds like it could really disrupt things by taking out a key solo or part of a units UA. I’d also love to hear your thoughts on the list, what changes you might make as a 35pt list and what direction you might go in taking it to a 50pt game.
As always, I hope you’ve enjoyed this glimpse into my newbish adventures, and I promise I’ll do better to get pictures at the end of both my and my opponent’s turns. Till next time, and may all your rolls be boosted!
